Support Design
Logo File Best Practices
The following best practices are particularly relevant to our channel partners utilizing Dreamship to sell branded products.
Logo File Best Practices
In this section
Background
Recommended Logo File Specs
What to Ask your Clients for
How to Convert a Vector File into a PNG-24
How to Change the Color of a Vector File
Background
The following best practices are particularly relevant to our channel partners utilizing Dreamship to sell branded products. The file guidelines are meant to ensure that our partners can obtain high enough quality art files to build catalogs for their clients across a wide range of products utilizing tools like Logo Resize/Position.
Recommended Logo File Specs
Logo 1 - A COLOR and/or BLACK version of your client’s logo. This will look best on white or light-colored items such as a gray t-shirt or a white mug.
Pixel Width: 8,000
File Type: PNG-24
Background: Transparent
Logo 2 - A WHITE version of your client’s logo. This will look best on dark-colored items such as a royal t-shirt or a black mug.
Pixel Width: 8,000
File Type: PNG-24
Background: Transparent
What to Ask your Clients for
When asking your clients for logo files, you should either ask them to send you logo files that meet the specifications listed above under “Recommended Logo File Specs” or for a vector file that will allow you to convert their logo into the specs needed yourself through use of a 3rd party design program like Adobe Illustrator.
Notes:
Vector files come in a variety of file types. Common file types are SVG, WMF, EPS, PDF, CDR or AI.
Vector files can NOT currently be uploaded into our system so if you receive vector files they MUST be converted into an acceptable file to upload into Dreamship. To learn how to convert a vector file into a PNG-24, see the below section “How to Convert a Vector File”.
For more information on vector files, see Adobe’s article on the subject.
How to Convert a Vector File into a PNG-24
There are many programs that this can be done in but for the sake of this example, we will be using Adobe Illustrator. The workflow will change depending on the program and that program’s interface
1. Open up your vector file in a 3rd party design program (we are using Adobe Illustrator for this example)
*Note - To learn how to change the color of your Vector file before saving, see the below section “How to Change the Color of your Vector File”
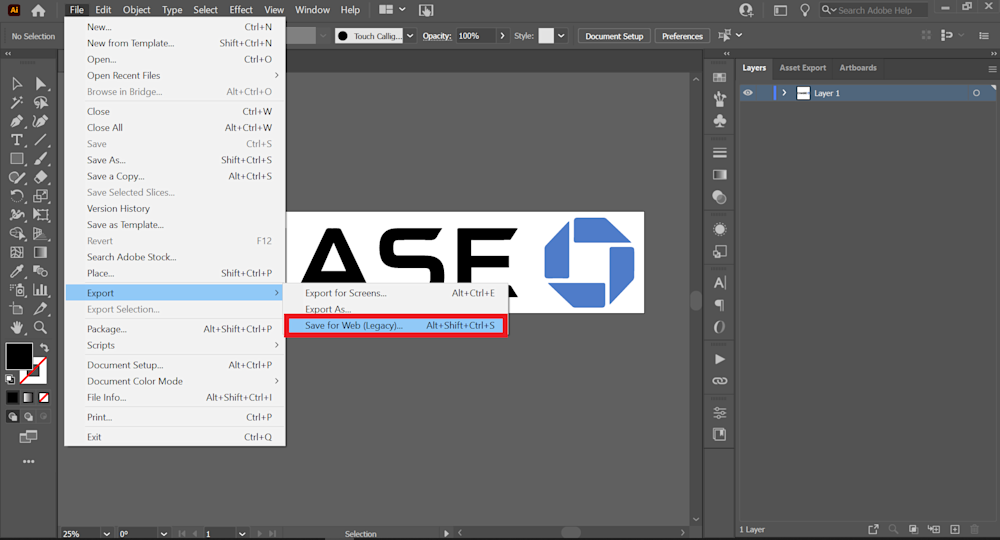
2. Click “File”, scroll down and hover over “Export” and click “Save for Web (Legacy)”
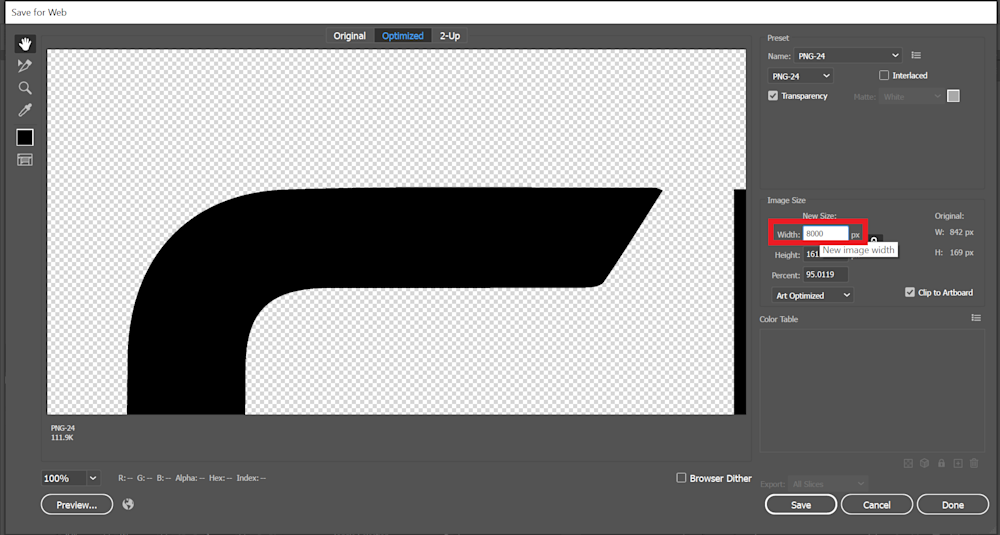
3. Click the “Name” dropdown and select “PNG-24”

4. Click into the “Width” field and enter a value of 8000 pixels
*Note - Ensure that the link button is clicked as this will ensure that the “Height” value will automatically adjust to a consistent ratio as you change the “Width” value
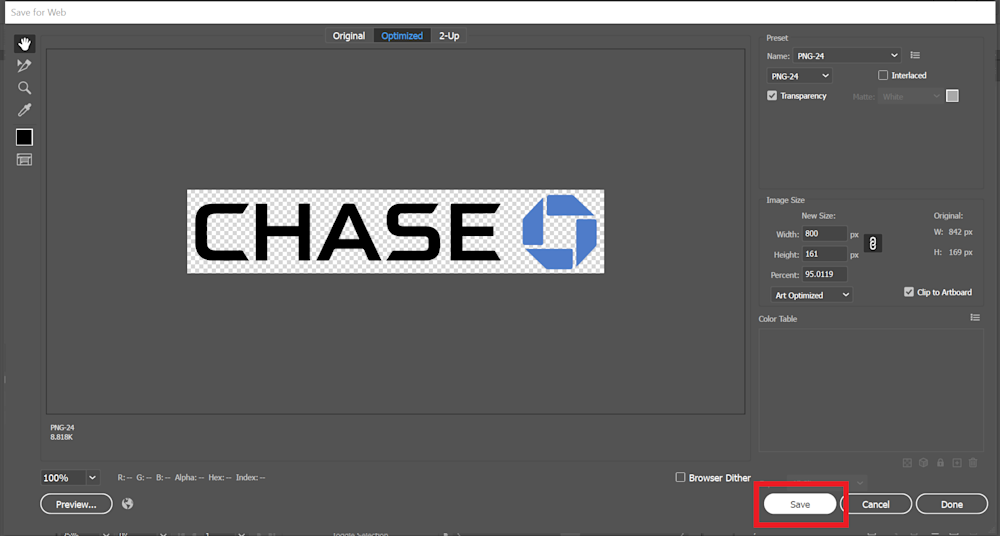
5. Click “Save” and save your PNG-24 in your desired location
How to Change the Color of a Vector File
There are many programs that this can be done in but for the sake of this example, we will be using Adobe Illustrator. The workflow will change depending on the program and that program’s interface.
1. Open up your vector file in a 3rd party design program (we are using Adobe Illustrator for this example)
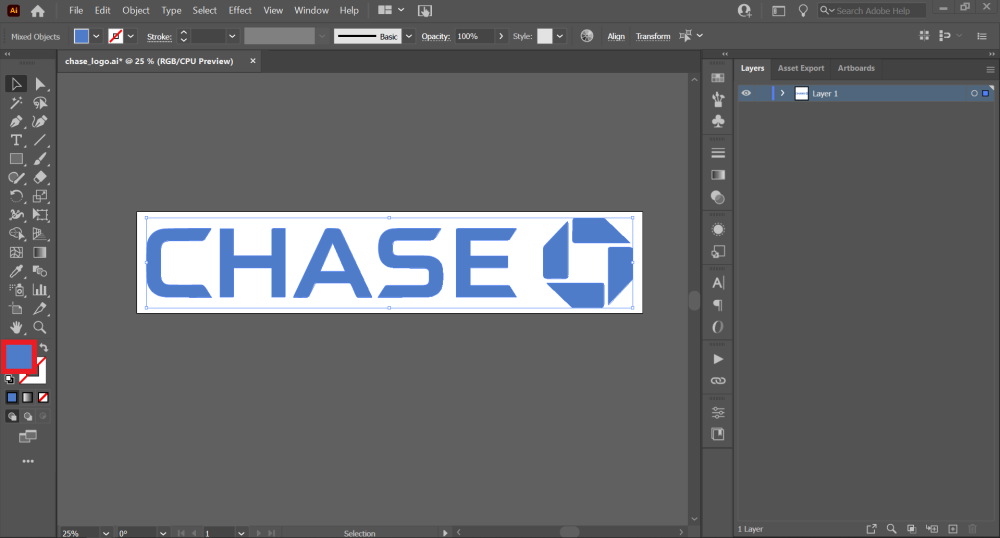
2. Select your file elements by using the Selection Tool and dragging your mouse around all the elements
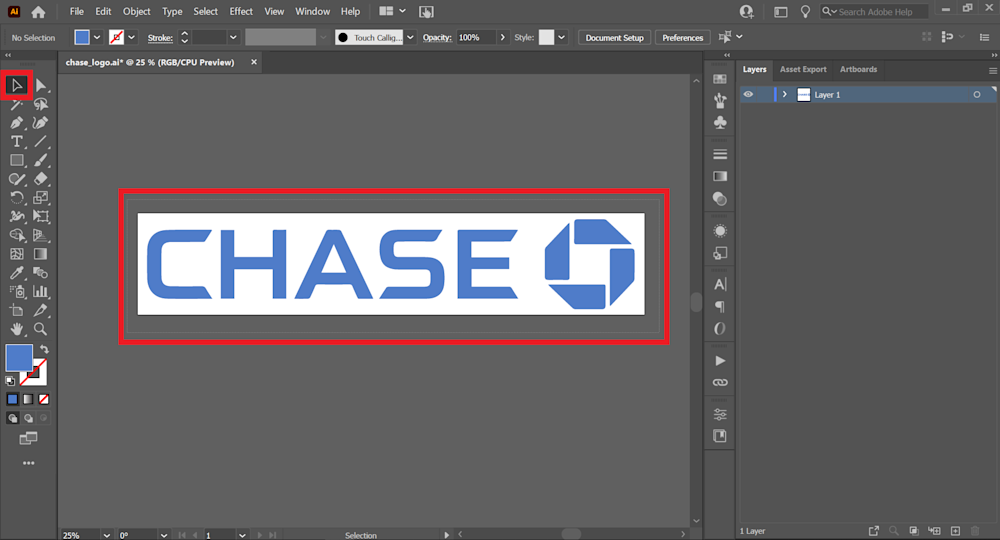
3. Once selected, double-click the color selector at the bottom left.
4. Enter in your desired HEX code and click “OK”
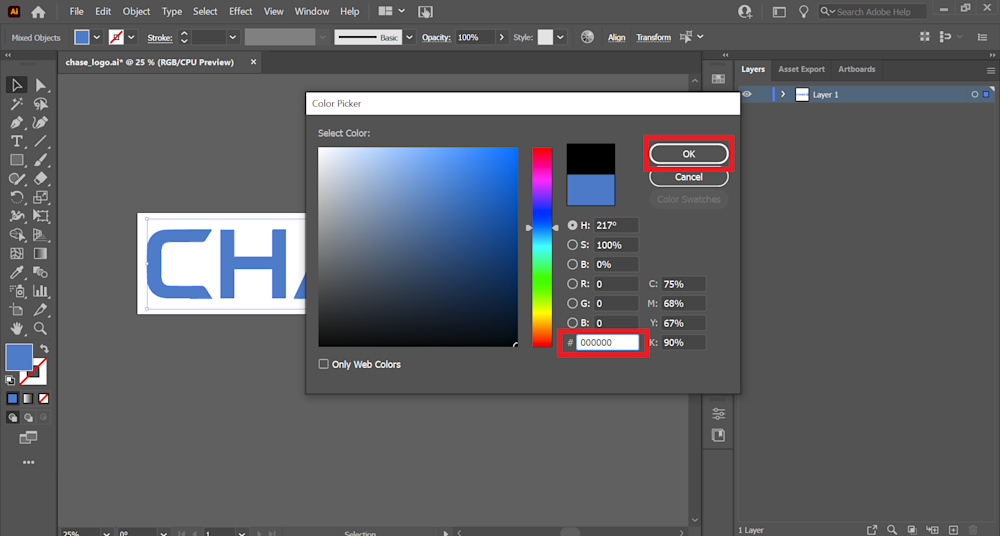
5. You will now see your vector file in your desired color. From here, you can export this version of your file using the “How to Convert a Vector File into a PNG-24” instructions listed above.